Showing posts with label Craft. Show all posts

Saturday, February 14, 2009

More crafts from David and Saul

One thing about going through the whole book of 2 Samuel with school aged children, there are a lot of violent stories.  The week when Saul killed himself was especially challenging. But, weapons-based craft projects are pretty appealing. Here I cut out a sword pattern on posterboard and let them cover the blade with aluminum foil. I think adding the plastic jewels on the handles helped it be more appealing to the girls, but even the boys enjoyed decorating them. The memory verse from Proverbs: "Pride goes before destruction, and an haughty spirit before a fall" helped tone down the violent tendencies.

For the story of David bringing the ark back to Jerusalem (and Uzzah's unfortunate demise we made Ark of the Covenants, adapted from this version on Danielle's place. I changed it by pre-hotgluing small gold jump rings to one popsicle stick, then having the kids thread a gold-pained coffee stirrer-sized stick through that for the carrying pole. Thankfully, they sell gold tempera paint at Michael's, so you don't have to deal with spray paint, or use yellow and brush with gold glitter.
Nathan's Lamb Parable Craft

Tomorrow in Sunday School we are making our own version of this lamb craft, because, well, let's face it, there isn't much else from the story of David and Bathsheba schoolchildren can safely immortalize in cardboard, Magic marker and white glue. Only, instead of the scissors, the lamb is holding a scroll with the week's memory verse: "Create in me a clean heart, O God, and renew a steadfast spirit within me. Do not cast me away from Your presence and do not take your Holy Spirit from me. Psalm 51: 10-11.

Sunday, February 1, 2009

King David's Crown Cookies

Another food related craft from the life of David. I cut out the cookies the night before; the kids filled, baked and decorated the plate during class.
You need one batch sugar cookie dough, prepared (I used the Betty Crocker mix, immortalized in the "he's gonna leave!" commercial) and one bag Jolly Rancher candies, separated by flavor.
Beforehand, make and chill cookie dough. Grind Jolly Ranchers in food processor and store separated colors in plastic bags.
Roll out the dough and cut into crown shapes. I did a rectangle about the size of a small card envelope, then cut it in half with a zigzag pattern to make two crowns. Place on foil-lined cookie sheets. Using small shaped cookie cutters or the top to a soda bottle, cut small shapes out for jewels. Using a small spoon, have the kids fill in the holes with powdered candy.  For best results, get as little as possible on the cookie dough and pile up a small heap in the center. Bake at 350 degrees for 8-10 minutes.  Remove from oven and cool at least 10 minutes; you can speed this process by taking the foil off the cookie sheet. Make sure candy jewels are hardened, then carefully remove the cookie.

Note: these cookies can look better than they taste; the melted candy can take on a burned, bitter flavor, so be forewarned. Making them is still fun for the kids.

Sunday, January 18, 2009

David takes Saul's jug and spear craft

We're working our way through the book of Samuel in our elementary age Sunday School class. Today's craft, to go with the story about David sparing Saul's life, went well, so I wanted to share it. See earlier posts for Samuel's calling and Abigail.

"Stained glass" jug with spear
Here's what you need.
  • Wax paper
  • Crayons
  • Cheese grater or manual pencil sharpener
  • Small ziploc bags
  • Black sharpie marker
  • Coloring sheet with jug picture (I found a good one here, but I omitted the handle to make cutting easier)
  • Coloring page with spear picture (I made one using this image.)
  • Scissors
  • Glue
  • Iron
  • Ironing board
  • Newspaper

Do ahead:
Grate or sharpen crayons, saving shavings in individual bags, sorted by color. 3-5 bright colors should be plenty. With black marker, trace the jug on the right half of a piece of wax paper, making one for each child.
In class:
Cover tables with newspaper to prevent scatter. Give each child a piece of wax paper and have them sprinkle crayon shavings onto the jug drawing. Use sparingly, a little goes a long way. Fold wax paper in half, sandwiching shavings between the layers.
Heat iron to medium. Have kids bring their jug one at a time to the ironing board (also covered in newspaper) and place on surface. cover with another piece of newspaper and have an adult iron briefly. Crayons will melt and colors will spread, making a glazed-looking effect on the paper jug. Remove wax paper and let cool, then have the kids cut out their jug. They can then color and cut out their spear and glue it on.
This is adaptable for any story involving a pot or jar, such as Rebekah watering Isaac's camels or the woman at the well.

Sunday, January 11, 2009

Abigail and David craft

Then Abigail made haste and took two hundred loaves of bread, two skins of wine, five sheep already dressed, five seahs of roasted grain, one hundred clusters of raisins and two hundred cakes of figs and loaded them on donkeys.  I Samuel 25:18. I've discovered during all my years of teaching Sunday School that kids like almost any activity involving food. Today they had the chance to pack up their own donkey, Abigail style.  You need, for each child:
  • 1 coloring book picture of a donkey (I found a great Abigail one here.)
  • 1 piece of cardboard or posterboard, cut slightly larger than picture
  • glue
  • sandwich-size baggie with twist tie
  • hole punch or scissors
  • beef jerky (represents the sheep meat)
  • puffed wheat cereal (I used plain, kids would probably like Honey Smacks style better)
  • rolls or bagels
  • raisins
  • fig newtons
  • crayons or markers
  • masking tape
Trim the picture and glue it to posterboard. With hole punch or scissors, cut a small hole at the top of the donkey's back, where the saddlebag would go.
Cut bread, jerky and fig newtons into small pieces. Have the kids fill the baggie with an assortment of the foods, making a total volume about egg-sized. Close the bag with the twist tie, then stuff the end through the hole in the cardboard so that the food hangs where the donkey's saddlebag should be. Secure on the back with masking tape. Kids can color the picture, take it home and eat the bagged food later as a trail-mix style snack. I also roasted a couple of lamb shanks and took them in so the kids could taste real sheep meat, and served grape juice in a bota bag canteen ($6 at Wal-mart).

Tuesday, December 16, 2008

Samuel Called By God Craft

This was a craft my elementary-aged Sunday School class had fun with when we did the story of Samuel. All you need is foil, mini-marshmallows (we used multicolored) and a mini-gingerbread boy or other human-shaped cookies (we used Keebler elves).  On a piece of foil, line up the marshmallows in a rectangle pattern (we did 6 rows of 4; adjust depending on the size of your cookie.)  Place on cookie sheet and heat in a 350 degree oven for 2-3 minutes; watch carefully so they don't brown.  Marshmallows will puff up and stick together, creating a patchwork quilt-like effect.  Cool, and you have an edible "bed" for Samuel to sleep in and hear the voice of God. After they act out the story, they can eat the bed and cookie for a snack.

Monday, December 8, 2008

English Christmas Crackers

I've always wanted to try these, so I made some for my Cadette Girl Scout troop for our last meeting before Christmas break. I found them not hard to make at all; following the directions here, I assembled and filled five in less than an hour. The only supplies I bought online were the cracker snaps, which were reasonably priced and arrived promptly. I got cheap shiny paper and curling ribbon from the Dollar Tree and recycled toliet paper rolls for the tubes. My Scouts got their Cadet Challenge pin and a patch for our holiday service project, along with a mini-Sharpie marker, a Bonne Belle Lip Smacker, a traditional bad joke (I found lots online, most clean enough to use!) and some candy. I have extra supplies and some candy and Dollar Store trinkets for them to make their own to give to family and friends. I don't know yet how well the things actually "crack" but they certainly look festive. I could imagine throwing a big dinner party and having one at every place setting. If the Scouts have as much fun making them as I did, it will be a good meeting.

Sunday, April 6, 2008

Sunday School Baptism Craft

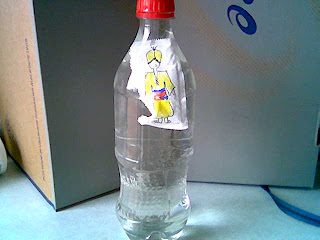
I've done this craft twice with Sunday School classes and it's been a big hit both times.  Today, my preschoolers made them as part of their lesson about Phillip and the Ethiopian eunuch, but
it's adaptable for any baptism story (Lydia, John the Baptist, etc.) Or, draw a whale instead for the story of Jonah.  Older siblings of the preschoolers (up to high school age) were spied playing with the bottles after church.

This is a variation of the Cartesian diver.  For each craft you need:
  • 1 ketchup packet
  • 1 clear 16-20 oz. plastic bottle
  • Sharpie markers, or other waterproof brand
  • Masking tape (optional)
  1. You'll need to pre-screen your ketchup packets to find ones that are suitable.  I've had good luck with Heinz brands from Burger King and Chick-Fil-A. Drop them in a big bowl of water.  You want ones that float vertically while almost completely submerged.  Packets that sink to the bottom or that float horizontally in the top will not work.
  2. Have the kids draw a picture of the person being baptized on the white side of the packet.  Be careful using permanent markers with kids and be warned that they have a tendency to smear on the slick packet.  For younger kids, it may be better for the teacher to pre-draw the picture.  Be sure the image is dry before proceeding.
  3. Fill the bottle with water and gently push the ketchup packet in.  Fill with water to the top and screw the lid on tightly.  Securing the cap with making tape will discourage young hands from removing it.
  4. Squeeze the bottle gently and the ketchup packet sinks to the bottom. Release, and it rises again.  Great fun!

Monday, November 19, 2007

Cinnamon Spice Craft Dough


With the holidays coming up, it's time I share one of my favorite crafts. This dough makes wonderful ornaments that smell great during preparation, hold their shape and bake into hard, long-lasting shapes. Paint them with a little glitter gel and they look like brown sugar cookies. A wonderful Sunday School project. Not edible!
  • 4 cups flour
  • 1/4 cup cinnamon
  • 3 tablespoons nutmeg
  • 2 tablespoons cloves
  • 1 1/2 cup warm water
Mix dry ingredients. Add water gradually, until mixture is like playdough. Role to 1/4 inch thickness and cut with cookie cutters. If hanging, make a hole with a drinking straw. Bake at 300 degrees for 1 hour.

Monday, September 24, 2007

Burning Bush Craft

Here's an idea that my K-5 group had fun with. I got some of those "snap and glow" bracelets from the Dollar Tree (a pack of 5 was $1) in red and yellow. The kids glued paper leaves to a popsicle stick "bush" and paper "flames" to the bracelet. Then, they twisted the bracelet to start it glowing and hung it on the bush. Very cool, though the paper flames had a hard time sticking to the plastic bracelet; if I was going it again I'd use Scotch tape or hot glue. While we did stand-alone bushes in paper cup bases, this would also work on a construction paper collage.

Sunday, September 9, 2007

Baby Moses Jello craft

Adapted from an idea on Danielle's place. My K-5 class enjoyed this today. Instructions are for 12 projects.
  • 2 packages blue Jello
  • 12 paper plates
  • 12 clear plastic cups
  • 1 package refrigerated sugar cookie dough
  • 12 Teddy Grahams*
  • 1 Fruit by the foot
  • 36 pretzel sticks
  • 36 spearmint leaf gumdrops
  • 12 toothpicks
  • 1 tube black decorating icing
  • 12 knives or popsicle sticks
Do ahead:
  1. Prepare Jello according to directions, pour abut 1/3 cup into each plastic cup.
  2. Prepare cookie dough baskets. Roll dough thin and cut into 12 2.5-inch circles. place each circle in a greased mini-muffin tin, press into cup. Bake at 350 for 5 minutes. Remove from oven and use a spoon to press the puffed-up cookie dough down into a well in the center. Return to the oven for 5-7 more minutes, until brown. Remove from oven and press with spoon again if needed. Cool before removing from pan.
For class:
Give each child a plate with a cup of Jello, a cookie basket, a Teddy graham, a 1-2 inch strip of fruit rollup, a toothpick, 3 gumdrops, 3 pretzels and a blunt knife. Squeeze a dollop of icing onto each plate, and have the kids coat the outside bottom and sides of their basket with "pitch," spreading on icing with the knife. They can wrap their "Baby Moses" Teddy graham in the fruit-roll-up "blanket" and put him in the basket. Place the basket on the blue Jello water of the Nile. (Kids like "jiggling" it at this step to watch baby Moses "float.") For weeds, have them make a small hole in the gumdrop with their toothpick, then insert a pretzel. Stick the "weeds" in the water around Baby Moses' basket. Finished craft looks like this:
*My son pointed out after class that Sour Patch kids candy would have worked, as well.

Sunday, September 2, 2007

Paper mache pyramid

I'm adding a new non-food category to my blog: crafts! (Hey, they're mostly done in my kitchen!) I did these with a K to 5th grade Sunday School class today; we are starting a unit on Exodus. But, this would work well for one of those Egyptian school projects that always seems to pop up by about 4th grade or so.
  • Paper Plates
  • Popsicle sticks
  • Hot Glue Gun
  • Masking tape
  • Brown paper "bricks" (strips of brown paper bag or butcher paper, cut into small rectangles)
  • Paper Mache paste (I use 1 part flour to two parts water, with a couple of tablespoons of salt added)

Hot-glue together a frame for your pyramid on the plate. Plates cut down on the mess when working with small children.

Use masking tape to make some "support beams" cross each triangle face. Tape strips should be slightly closer together than the height of your "bricks."

Fold your first brick in half, dip in paste and shake off excess. Place over corners starting at bottom. Work your way up with additional "bricks", overlapping paper strips slightly.


Once edges are covered, fill in surfaces of pyramid using same paper mache technique, making horizontal rows of bricks. Finished product should be completely covered. Let dry.